Question: How do I put a table on my web page?
Answer:
Tables can be inserted in text elements using the Rich Text Editor.
| Step | Instructions | Example or Picture | Notes |
|---|---|---|---|
| 1 | Put the cursor in the place where you want the table, then click the table icon in the toolbar. | ||
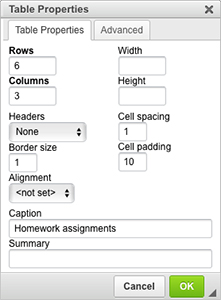
| 2 | The Table Properties window will appear. Fill in the number of rows and the number of columns you want the table to have, including heading rows. We recommend setting Cell Padding to 10. The other settings are usually fine but you can experiement with them. See How do I control the way a table looks? for full details. Click the OK button. |
 |
You can change these choices later. See How do I insert and delete rows and columns? and How do I control the way a table looks? |
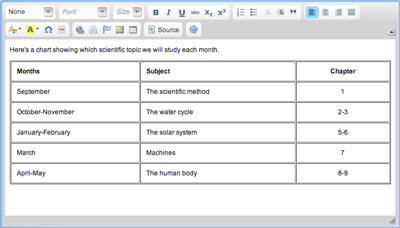
| 3 | An empty table will appear in your text editor window. Click in each cell of the table and type the text you want in each cell. The column widths will adjust automatically as you type. |
You can navigate among table cells by clicking or with arrow keys. Up and down arrows skip to the previous or next cell. | |
| 4 | You can use the toolbar buttons to control how your text looks. For example, to make text bold, highlight the text and click the B (bold) icon. To left-justify, center, or right-justify a table cell, click in that cell and then click one of the justification icons in the top right corner of the toolbar. |
 |
To see more of the table, use the scrollbar. You can also enlarge the window by clicking and dragging on the triangle symbol in the bottom right. |
| 5 | When you are done you can continue to edit other text in the Rich Text Editor or you can click the Save & Exit button to save your table. |  |
If you change your mind about adding the table, click the Cancel button instead. |