Question: How do I set up a slideshow?
Answer:
Slideshows let you put many images in the space of one image, so visitors to your website can see a new picture every few seconds. Without slideshows there wouldn't be room on your web page for a lot of pictures.
| Step | Instructions | Example or Picture | Notes |
|---|---|---|---|
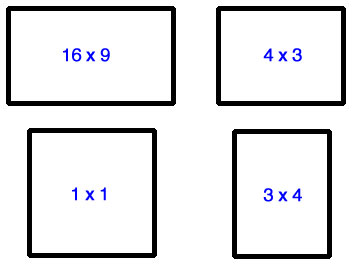
| 1 | Decide what pictures you'd like to have in your slideshow. It helps if they are all the same proportion ("aspect ratio"), typically one of these: 16x9 ("landscape"), 4x3 ("standard"), 1x1 ("square"), or 3x4 ("portrait"). School Loop also supports two very wide aspect ratios (7x1 and 3x1) and one very narrow aspect ratio (1x4). If you have a mixture of portrait and landscape pictures, such as you get from camera photos, you may want to create two separate slideshows, one for each direction. If you combine them in one slideshow, you'll probably need to crop them to square areas. |
 |
|
| 2 | Upload all of the pictures that are to go in your slideshow, to one of your albums or to a new album. See How do I upload a picture to an album? | ||
| 3 | Decide where on which web page you want the slideshow to appear. Click the plus-sign icon in that position. |
 |
|
| 4 | Choose Slideshow from the Element Gallery. | 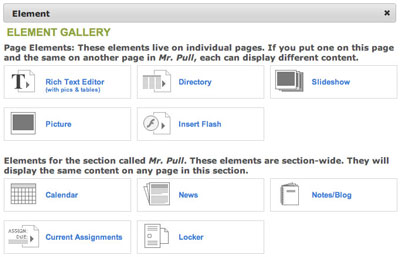 |
If you change your mind about putting a slideshow on your web page, click the x in the top right corner. |
| 5 | The Create Slidesown window will eppear. | 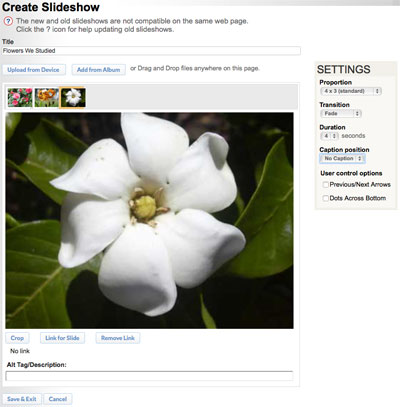 |
If you change your mind about adding a slideshow, click the Cancel button. |
| 6 | Choose the settings you want on the right:
|
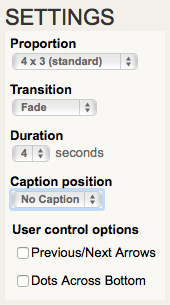 |
It's best to set Proportion and Caption position and not change them. Otherwise, you might have to go through all of the pictures to change cropping and captions. You can change the other settings later without problems. |
| 7 | Now it's time to add pictures to your slideshow. Click the Add from Album button. The Album Library screen will appear. |
 |
You can also add pictures by clicking Upload from Device or dragging picture files from a window on your computer to the Create Slideshow page. |
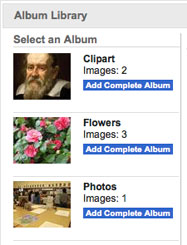
| 8 | Click the album that contains the pictures you uploaded, e.g., Clipart, Photos, or another album you've created. Pictures from that album will be displayed. |
 |
If you change your mind about selecting pitures, click the x in the top right corner. |
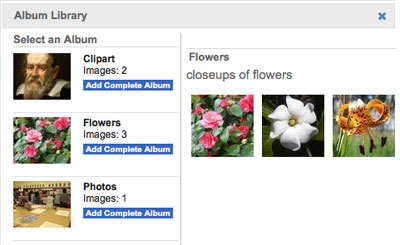
| 9a | If you want to add all of the pictures in this album to your slideshow, click the Add Complete Album button to select all pictures, and then skip to Step 10. If, instead, you want to add only certain pictures from this album to your slideshow, do Steps 9b and 9c and then return to Step 7 to add the next image. |
 |
If you want to add most pictures from an album to your slideshow, you can add them all first, then selectively delete the ones you don't want. The Add Complete Album feature may encounter a bug that gives you a busy cursor forever. If this happens, click the Back button of your web browser and select pictures one at a time (Steps 9b and 9c). |
/tr>
| 9b | Click on a picture that you want to add to your slideshow. The cropping screen will appear. | 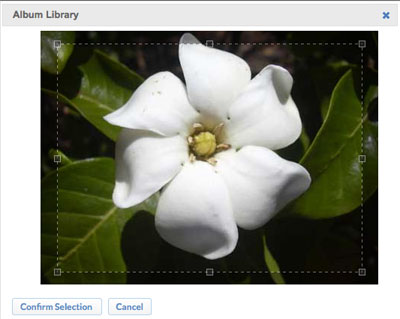 |
|
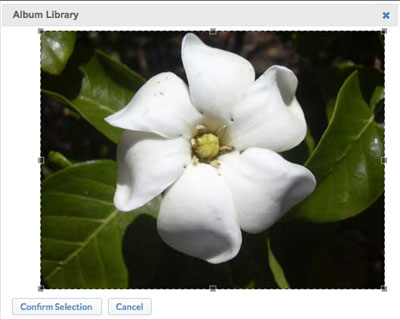
| 9c | Drag the "handles" at the corners of the dotted cropping rectangle to frame the best part of the picture. The rectangle will stay in the aspect ratio you selected with the Proportion setting. Due to a bad design, School Loop tries to crop the edge of every picture by default. For almost every picture you'll want to drag the dotted rectangle to the full height or width of the picture. When you are done dragging, click the Confirm Selection button. You'll return to the Create Slideshow screen. If you have more pictures to add, return to Step 7. Otherwise, proceed to Step 10. |
 |
If you just can't get a good cropped image, click the Cancel button and skip this picture. |
| 10 | You are ready to edit the overall slideshow. To change the order of the slides: Drag the thumbnails right and left, or up and down if there is more than one row of thumbnails.To delete a picture from the slideshow: Click the X to the right of the thumbnail. |  |
|
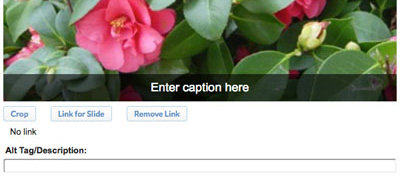
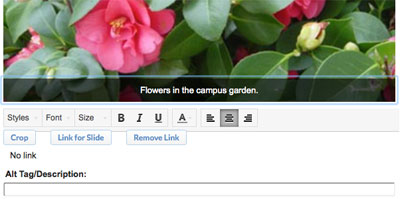
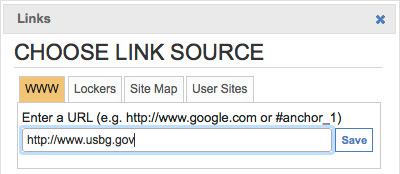
| 11 | To set features for each picture, click each thumbnail in turn. The full-size picture will appear and you can do the following: To add a caption (if you chose that setting): Click in the caption area where it says "Enter caption here". Type your caption text. While you are typing, a toolbar will appear that lets you set the text's style, font, size, color, and centering/justification. As a service to the visually handicapped, enter the same text in the Alt Tag/Description field.To re-crop the picture: Click the Crop button. The image will appear in a new window. Drag the "handles" at the corners of the dotted cropping rectangle to re-frame the picture.To make it so clicking a picture will take a site visitors somewhere (a little-used feature): Click the Link for Slide button. The tabbed Choose Link Source window will appear. Using the appropriate tab, enter a web adddress, choose a locker file, choose the Palms home page, or choose a web page of another teacher.To remove a link you added: Click the Remove Link page. |
   |
|
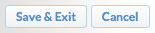
| 12 | Your slideshow is ready. Click the Save & Exit button. |
 |
To abandon all slideshow additions and changes, click the Cancel button. |
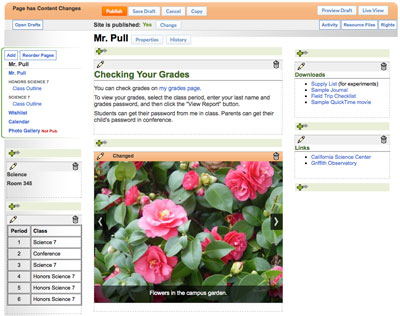
| 13 | The slideshow will appear on your web page. If the slideshow isn't the way you want it, click the pencil icon to return to the Create Slideshow window and return to Step 5. |
 |
|
| 14 | To make the slideshow visible to site visitors, click the Publish button at the top of the page. |  |
If you change your mind about having the slideshow on your web page, click the trash-can icon above it. |