Question: How do I update my grades web page on a Mac?
Answer:
Start on a computer that has Easy Grade Pro, your gradebook, and an Internet connection. Then follow these steps to replace the grades on your grades web page with the latest grades. (You must have previously done all of the steps in the Setup for Grade Uploading section.)
If you are using a file-transfer program other than Cyberduck, the details will differ but the steps will be similar.
| Step | Instructions | Example or Picture | Notes |
|---|---|---|---|
| 1 | Find or create a folder on your disk for storing grades files. You can use the same folder each time you follow these steps. Name the folder grades. The name must be in lowercase: grades, not Grades. |
Suggested location (what we use in this documentation): Documents/grades  |
The folder can be anywhere on your computer's disk. |
| 2 | Open the grades folder and delete any files in it. We want it to be empty because we're going to recreate and replace the files. Close the empty folder. |
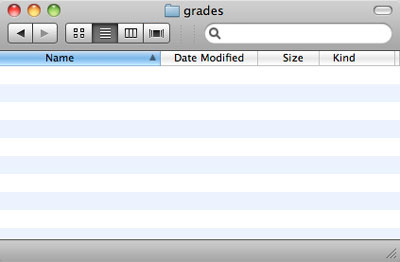 |
Select all files in the folder and drag them to the Trash. |
| 3 | Launch Easy Grade Pro on your gradebook and click the @ icon or choose menu choice File -> Email/Internet. | 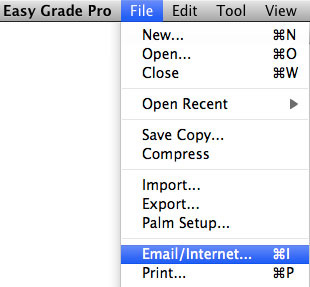 |
If you have Easy Grade Pro 4.1 or later, you need to hold down the option key while you click the @ icon or choose from the menu in order to enable the Email/Internet feature (Edline, the author of Easy Grade Pro, purposely made it harder to find this menu choice because they want to promote their paid grade-hosting service.) |
| 4 | Set the "Action" to Create Website Reports, select which classes you want to include, check Include Grade Summary Chart and indicate which other information you want to have appear for each student on the grades web page. There are many settings you can choose from so you might want to go through them the first time, clicking the triangles to open each section. Easy Grade Pro will remember the choices you make for the next time. |
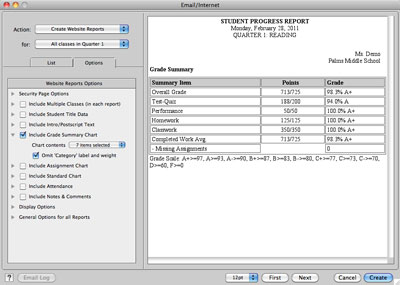 |
You can click the Next button over and over to see what the web page will look like for each student. |
| 5 | Click the Create button. You'll get this reminder. | ||
| 6 | Navigate to the empty grades folder from Steps 1 and 2 above, then click the Save button. |  |
|
| 7 | Easy Grade Pro will fill up the folder with files like these. | 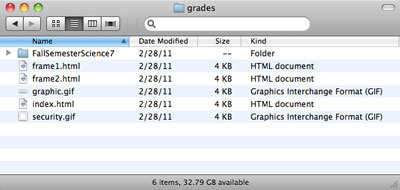 |
The specific filenames you'll see depend on the classes you have. |
| 8 | Choose menu choice Easy Grade Pro -> Quit to quit from Easy Grade Pro. You can click No when it asks whether to make a backup copy. |
||
| 9 | Launch the Cyberduck program by double-clicking Cyberduck in your Applications folder or on your desktop. If you get an offer to update to a new version, decline. |
If you plan to upload grades often you can put an alias of your Cyberduck application on your desktop, in the dock, in the Finder toolbar, or in another convenient place. | |
| 10 | Cyberduck should connect to your grades web page. If you are prompted for your password, fill it in. If Cyberduck doesn't connect to your grades web page automatically, choose menu choice Bookmark -> Grades Web Page. |
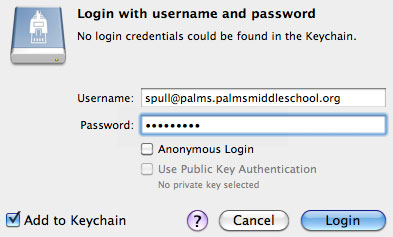 |
If you don't remember your grades website password, contact Neil Cuadra. |
| 11 | You'll see a Cyberduck window with the grades folder you uploaded the last time. | 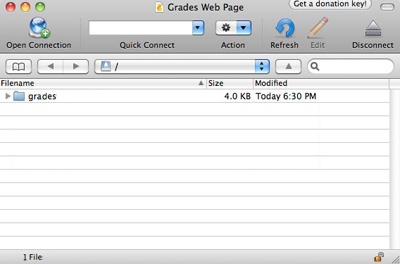 |
The folder won't appear if this is the first time you've uploaded grades. |
| 12 | Find the grades folder (from steps 1 and 2) on your disk. | |
You want to see the folder, not the contents of the folder. If you're viewing what's inside the folder, go up one level to the containing folder. One way to do that is to hold the ⌘ key and click on the folder name ("grades") at the top of the window. |
| 13 | Drag the grades folder into the Cyberduck window. Drag into the open area, not onto the grades folder icon. If you get an error message saying "Cannot delete..." click the |
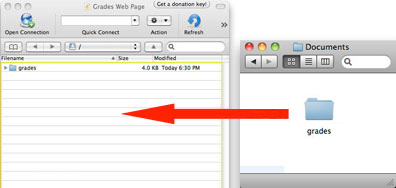 |
Make sure you are dragging from the folder on your disk to the Cyberduck window, not the other way around. |
| 14 | When you let go the folder (and all the files it contains) will start to be transfered. | File transfers can take several minutes even over a fast home Internet connection. At school it can take up to 25 minutes to complete the file transfers. | |
| 15 | If a window pops up to check if it's OK to overwrite the existing grades folder, click Continue. | 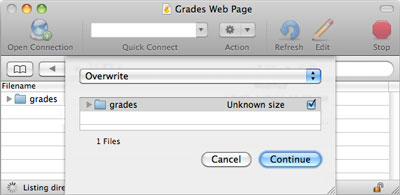 |
You can avoid this step in the future by going to Edit -> Preferences, Transfers tab, Uploads section, and setting Existing Files: to Overwrite. |
| 16 | After the files are transferred, you may see a Failures window telling you that some files did not transfer completely. The message looks alarming but in practice hasn't signaled a problem for which you have to do anything. If you see this mesasge click the Cancel button. Don't click the Try Again button because that will make you wait while all of the files are transferred again. |
||
| 17 | Choose menu choice Cyberduck -> Quit to quit from Cyberduck. The grades on your grades web page have been updated. If you want to test the results, go to your own grades web page in a web browser and display the grades for one of the students. |
http://grades.palmsmiddleschool.org/spull |